How to Add a Custom Avatar Image in PublishPress Authors
Follow these steps to update an author’s avatar using the PublishPress Authors plugin in WordPress.
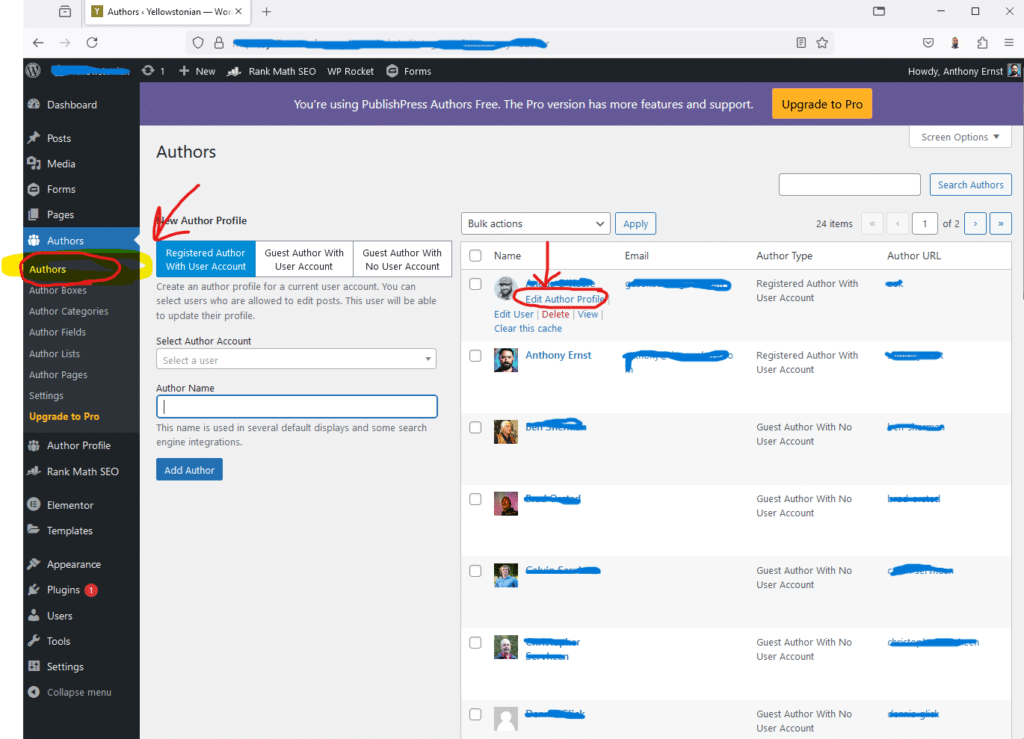
Step 1: Access the “Authors” Section
Log in to your WordPress dashboard.
In the left-hand menu, look for “Authors”. Click on it to see the list of all authors.

Step 2: Edit the Author Profile
From the list of authors, find the one whose avatar you want to change.
Click “Edit Author Profile” under the desired author to open the profile edit screen.
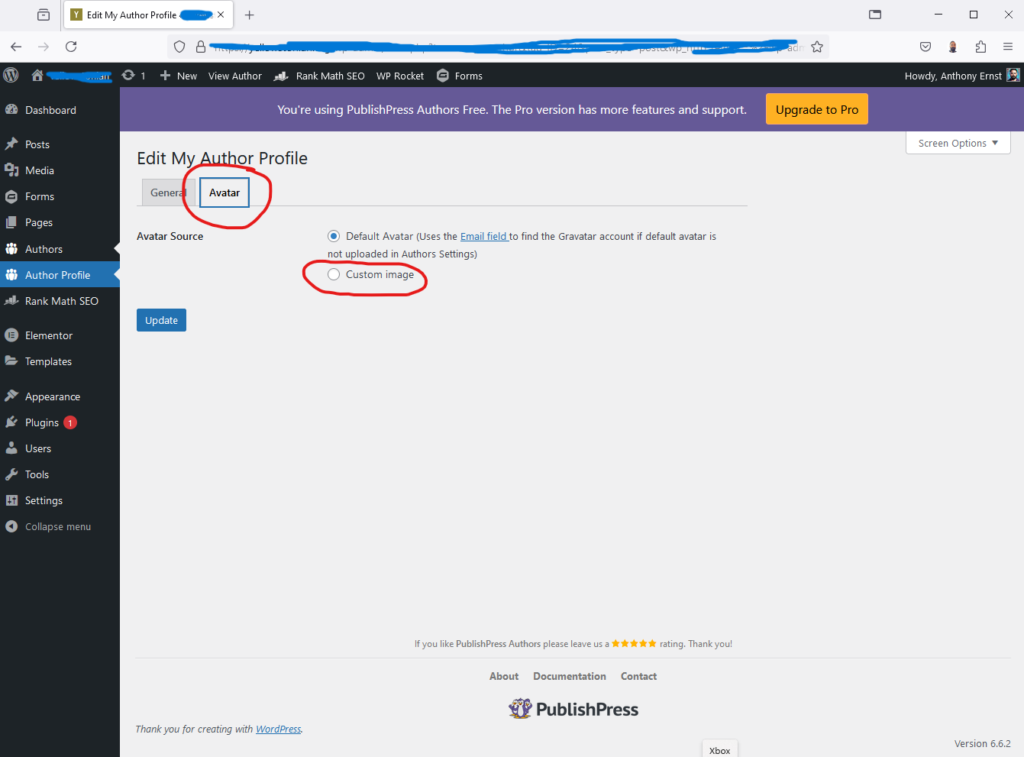
Step 3: Select the Avatar Tab
Once on the Edit Author Profile screen, click on the “Avatar Tab” at the top.

Step 4: Upload a Custom Avatar Image
On the Avatar Tab, you will see several avatar options.
Click the radio button next to “Custom Image”.
Use the upload tool to select and upload your desired avatar image from your computer.
Step 5: Save Changes
After uploading the image, scroll down and click the “Save” or “Update Profile” button to apply the changes.
The new custom avatar image will now appear on your site wherever the author’s profile is displayed.
This simple process allows you to personalize each author profile with a unique avatar, enhancing the visual appeal of your WordPress site.
How useful was this post?
Click on a star to rate it!
Average rating 5 / 5. Vote count: 1
No votes so far! Be the first to rate this post.
Author
-

Meet Anthony Ernst, the creative force behind ThreeSphere. With a passion for art and a knack for business, Anthony is a multi-talented entrepreneur who wears many hats. As the owner of ThreeSphere, he combines his expertise in web development with his artistic vision to craft stunning and functional websites for clients.
View all posts


